由浅入深学习Flash制作赛车游戏教程_Flash教程
推荐:Flash8实现动态星空的通用方法你想做星空吗?只需要把本教程的代码复制就可以了!先看下效果:制作方法:首先修改文档属性:黑色背景、帧频30fps新建立一个影片剪辑。在影片剪辑元件中绘制
赛车游戏我们总是碰到!今天给大家简单讲解一下。
先测试效果:
首先新建立一个赛车影片剪辑,由6个图层组成一个基本的赛车。放到舞台上的时候命名实例名为car1。

然后根据上面的车,制作一个赛车阴影影片剪辑。拖放到舞台上的时候命名实例名为shadow1。

然后建立一个新的空的影片剪辑。拖放到舞台上的时候命名实例名stepper。
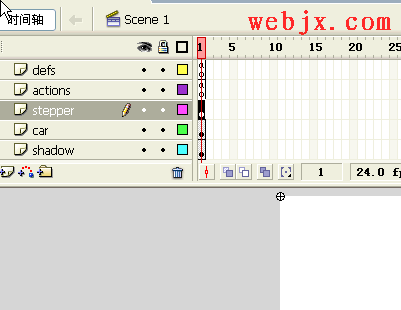
然后选中该空影片剪辑输入下面代码:
onClipEvent(load){
speed1 = 0;
}
onClipEvent(enterFrame){
_root.step(1);
}
然后新建立一个层Action,输入下面代码:
function step(who) {
//check to see if the car in question is controlled by the player or by the computer
if (_root["car" who].code == "player") {
//we will constantly decrease speed by multiplying it with a number below 1
if (this["speed" who]>0.3) {
this["speed" who] *= _root.speedDecay;
} else {
this["speed" who] = 0;
}
//the car will react to certain keys
//accelerate
if (Key.isDown(Key.UP) && this["speed" who]<_root.maxSpeed) {
this["speed" who] = _root.acceleration;
}
//brake (reverse)
if (Key.isDown(Key.DOWN)) {
this["speed" who] -= _root.backSpeed;
}
//steer left
if (Key.isDown(Key.LEFT) && this["speed" who]>0.3) {
_root["car" who]._rotation -= _root.rotationStep*(this["speed" who]/_root.maxSpeed);
}
//steer right
if (Key.isDown(Key.RIGHT) && this["speed" who]>0.3) {
_root["car" who]._rotation = _root.rotationStep*(this["speed" who]/_root.maxSpeed);
}
this["rotation" who] = _root["car" who]._rotation;
//we calculate the two components of speed (X axis and Y axis)
this["speedx" who] = Math.sin(this["rotation" who]*(Math.PI/180))*this["speed" who];
this["speedy" who] = Math.cos(this["rotation" who]*(Math.PI/180))*this["speed" who]*-1;
//apply the components on the actual position of the car
_root["car" who]._x = this["speedx" who];
_root["car" who]._y = this["speedy" who];
//position the shadow of the car
_root["shadow" who]._x = _root["car" who]._x-4;
_root["shadow" who]._y = _root["car" who]._y 2;
_root["shadow" who]._rotation = _root["car" who]._rotation;
}
if (_root["car" who].code == "computer") {
}
}
然后再建立一个层,输入下面代码(用于初始化变量)
car1.code = "player";
acceleration = 0.4;
speedDecay = 0.96;
rotationStep = 10;
maxSpeed = 10;
backSpeed = 1;
分享:Flash8制作图片由模糊到清楚效果以前记得是在哪个网站看到这个效果,但是怎么找也找不到了!所以给大家讲解一下如何制作。主要是讲解Flash8的blur滤镜,利用Actonscript调用blur滤镜实现由模糊
- 相关链接:
- 教程说明:
Flash教程-由浅入深学习Flash制作赛车游戏教程
 。
。